How to plan stores and storage layout for a new factory: a step-by-step guide
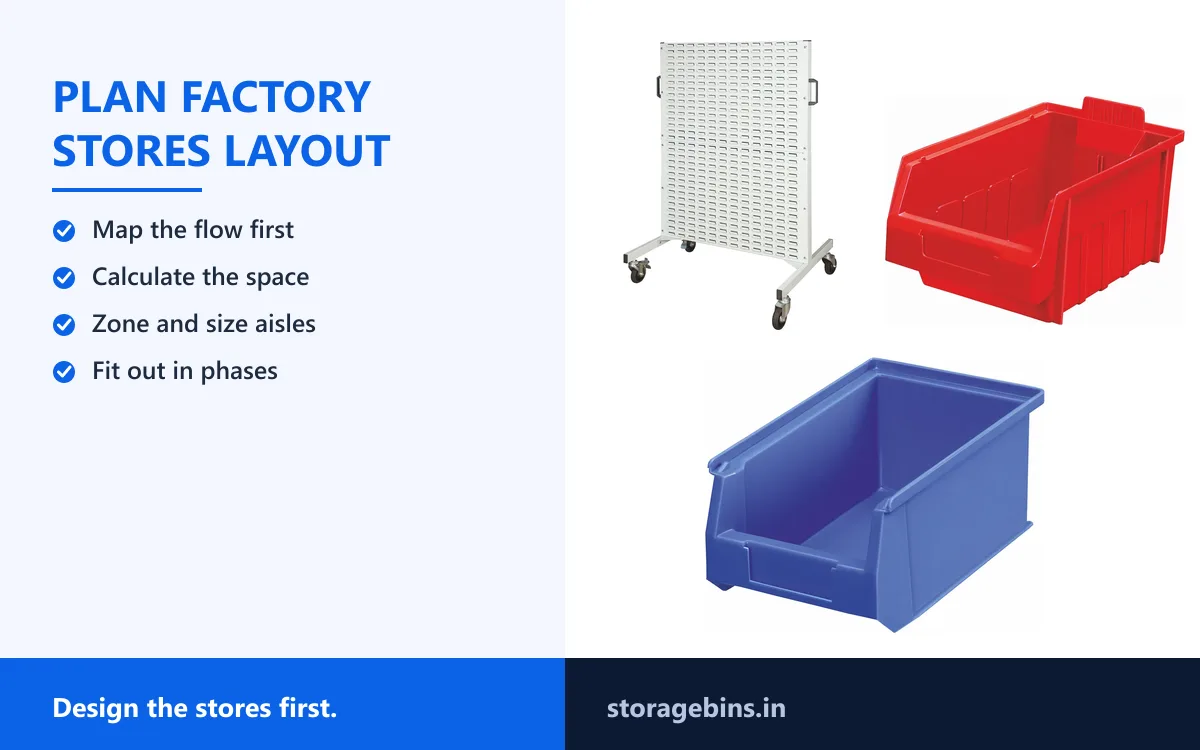
Most factories design the machines first and find room for the stores afterwards. A step-by-step method to plan stores, line-side storage and tool rooms before the building is fitted out: space arithmetic, zoning, flows, aisles, standards and a phased fit-out.
The stores that gets what is left over
When a new factory is planned, the order of attention is predictable. The building comes first, then the machines, the utilities, the offices and the approvals. The stores, the tool room, the line-side racks and the dispatch bay come last, and they are given whatever floor and budget remain. A year after start-up, the plant discovers that the stores is too small, the line-side space is a clutter of cartons, the tool room is a cupboard and nobody can find anything, and the fix is a rebuild on a live floor.
The mistake is understandable and expensive. The stores of a manufacturing plant is not a side issue. It decides how fast a line restarts after a changeover, how long a breakdown lasts, how much working capital is tied up in stock and how well the plant performs in a customer audit. And it is cheapest to get right before the walls and the floor are fixed, when a change is a line on a drawing and not a project.
This article sets out a step-by-step method for planning stores and storage in a new factory, or in an expansion of an existing one. It works from the flow of material to the space needed, to the choice of bins, shelving and trolleys, to the fit-out. The numbers in the examples are invented, and the method is the point.
Step one: map the flow of material
Storage exists to serve flow. Before deciding how big or where, trace how material moves through the plant, from the gate to the dispatch bay.
Draw the main flow: receipt of raw material and components, inspection, stores, issue to production, work in progress between operations, finished goods, packing and dispatch. Add the secondary flows: tools and fixtures from the tool room to the machines, maintenance spares from the stores to the machines, consumables to the lines, packaging to the packing area and scrap and returns back out.
For each flow, note the volume, the frequency and the nature of the goods: pallets, cartons, bins, loose parts, long items, heavy items, fragile items, items with limited shelf life, hazardous items. These characteristics decide the type of storage.
Look for conflicts. Does incoming material cross the path of finished goods? Does a tool room sit far from the machines it serves? Does the stores lie at the far end from the lines? A flow drawn on paper shows the conflicts, which a building will make permanent.
Step two: classify what will be stored
Not everything needs the same storage. Classify the items the factory will hold into groups, because each group wants a different solution.
Raw material and bulk components, stored on pallets and in large containers, belong in pallet racking or floor storage near the receiving area. Small components and fasteners, thousands of lines in small quantities, belong in bins on shelving and panels. Work in progress sits in totes, trolleys and bins between operations. Tools, gauges, jigs and fixtures belong in a tool crib. Maintenance spares belong in a spares store near the maintenance workshop. Packaging materials need their own area, close to the packing line. Finished goods need racking or floor space near dispatch. Hazardous items need approved, separate storage.
For each class, estimate the number of lines, the quantity of each and the size of the largest item. The estimate need not be exact, but it should be honest. A plant that thinks it will hold five hundred small part numbers and ends up with three thousand will have a stores far too small.
Step three: calculate the space
Space calculation is arithmetic, and it avoids most of the surprises.
For pallet storage, count the pallet positions needed: the average stock in pallets, plus a margin for peaks, divided by the number of levels. A selective rack with four levels needs a quarter of the floor positions of block stacking, plus aisles. Add the aisle width needed by the trucks, which depends on the truck type.
For bin storage, count the bins. For each small part, decide the bin size from the part dimensions and the quantity to hold, then count how many bins of each size are needed in total. The catalogue gives the dimensions: for example, a Panda shelving unit such as the ASU 1 holds 108 PSB 301 bins on 13 shelves, and the standard bay heights are 1275, 1875, 2175 and 2375 mm. From the bin counts, calculate the number of shelving bays, panels, stands and trolleys.
For tools, count the tool types and the instruments, and plan the crib: a counter, a hand-tool zone, a measuring zone and a consumables zone. A crib for a medium plant is a modest room, with panels, cabinets, drawers and trays.
Add working space. Aisles, a receiving area, an inspection bench, a staging area for kits and room for people to work need floor, and they are often forgotten. A common rule is to add half again to the net storage area for aisles and working space, but check against your own layout.
Add growth. Plan for the plant's expected expansion over five years, in lines, parts and volumes, and leave room for extra bays, panels and racks. It is far cheaper to leave floor and wall free than to find it later.
Step four: zone the factory
With the flows, the classes and the areas known, draw the zones on the plan.
Put receiving and inspection at the gate, with space for unloading and a bench for checking. Put the stores between receiving and production, so that goods flow forward. Put bulk and pallet storage where trucks reach it easily, and bin storage where people can reach it without trucks.
Put line-side storage at the lines, with space for bins, panels, trolleys and replenishment access. Put the tool crib near the machines, with a counter facing the production floor. Put the maintenance spares store beside the maintenance workshop, with its own entrance. Put packaging near the packing line, and finished goods near dispatch.
Keep clean and dirty apart. Machining, grinding and welding generate dust, oil and swarf, and they should not be next to stores of clean parts, electronics or packaging. Put dust-sensitive storage upwind and away from the dusty processes, or in closed rooms.
Plan for climate. Parts that must stay dry need a dry room, heat-sensitive items need a cooler area, and static-sensitive items need a grounded zone. In a hot plant, keep bins out of direct sun and away from furnaces.
Step five: choose the storage system for each zone
Each zone gets a storage solution matched to its contents. The ALKON range covers most of the small-parts needs.
Receiving and bulk: pallet racking, protected with Visipro rack protectors, deflectors and bollards. Mammoth bins, at 820 x 315 x 300 mm outside, hold bulky items and reserve stock on racking.
Stores of small parts: Panda shelving with shelf bins in a regular grid, pigeon hole shelves for boxed items and lockable doors for valuable stock. Transparent bins show contents.
Line-side: Supra, Hippo and Bull bins on louvre panels and stands, with totes and trolleys for kits and replenishment, as described in our article on line-side supply with trolleys.
Tool crib: louvre panels with shadow boards and tool trays, drawer containers in cabinets, fitted trays for instruments and a modular drawer system with a central lock for valuable tools. Our article on tool room and tool crib organisation sets out the layout.
Maintenance spares: Panda shelving and bins, pigeon hole shelves, locked storage for critical spares, as described in our article on organising a maintenance spares store.
Electronics: the ESD range, with conductive bins, organisers, carriers and workstations.
Work in progress: totes with partitions on trolleys, labelled by job.
Choose a small number of bin families and sizes for the whole plant, so labels, panels and spares are interchangeable. Our article on how to buy industrial storage bins gives a specification checklist.
Step six: design aisles and access
Aisles take floor, and a plant that squeezes them pays in speed and safety.
Pallet racking aisles depend on the truck. A counterbalance truck needs wide aisles, a reach truck narrower ones and a very narrow aisle truck narrower still, at higher cost. Choose the truck first, then the aisle, then the rack layout.
Aisles between shelving and panels depend on people and trolleys. A walking aisle between shelving units may be a metre or so, and a trolley aisle needs more, enough for the trolley to pass and to turn at ends. The Tuff trolley measures 995 x 700 mm, and the Shop Floor Trolley 970 x 600 mm, so aisles that serve them should be wider than the trolley with room for hands.
Plan cross aisles at intervals, so that people and trucks need not walk the full length of a bay to get across. Mark pedestrian routes, and separate them from truck routes where possible.
Plan the heights. The comfortable reach zone for picking is between knee and shoulder, and the top of a shelving unit or a panel should be within reach or served by steps. Heavy items go low. A 2375 mm Panda bay uses the room's height but needs steps or ladders for the upper levels, and those levels should hold light, rarely used items.
Plan lighting. Good light over every aisle and bench makes labels readable and reduces errors, and it is much easier to install during construction.
Step seven: plan the information
Storage is physical and informational at once, and the information has to be planned with the layout.
Decide the location code scheme before anything is installed: for example zone, aisle, bay, level and position, in a consistent format. Print the codes on the shelves and bins from the start.
Decide the label format for bins and totes: part code, description, size or specification, and location. Choose the colour scheme and what each colour means, and write it down.
Decide the stock system. Even a small plant should have a list of parts and locations, whether in a spreadsheet or an inventory system, and the code scheme should match it. Plan how receipts, issues and counts will be recorded.
Plan the count routine and the standards for tolerance and adjustment. Our article on cycle counting with storage bins describes how to count a store a few locations a day, and the routine is easiest to start at the beginning, when the locations are new and clean.
Write the standard on a page: the bin families and sizes, the label format, the location code, the colours and the count routine. It is the document that keeps the storage coherent as the plant grows.
Step eight: plan the fit-out in phases
A new factory does not open fully loaded, and the storage can grow with it. A phased plan avoids buying too much too early and keeps room for change.
Phase one covers what is needed for start-up: receiving, a core stores, the first line's line-side storage and a basic tool crib. Buy the standard bins and shelving for these, and install them to the layout. Keep the routines simple.
Phase two covers growth: more lines, more parts, more stores bays. Because the system is modular, additions fit what is already there. Add bays, panels, trolleys and shelves as the part list grows, and review the layout after the first few months.
Phase three covers refinement: tuning bin sizes and quantities from real consumption, extending the counts, adding dense storage where floor is tight and improving the layout from experience.
At each phase, keep a reserve of bins, partitions, labels and panels, and review the standard.
Step nine: budget and payback
A storage budget is smaller than most people expect, and it repays quickly.
Estimate the cost by listing the quantities: bins by size, panels and stands, shelving bays, trolleys, totes, rack protectors, labels and accessories. Multiply by the unit prices from quotations, and add installation and the time of your own people.
Estimate the return. The savings come from time saved on every search, stoppages avoided, stock errors reduced, space used better, losses reduced and audits passed. Our article on the true cost of storage bins gives a method for converting them into a payback case.
A plant that sets the standard at the start also avoids a hidden cost: the cost of retrofitting. Every stores that was rebuilt because it was too small or badly laid out shows what a planning hour is worth.
Step ten: avoid the common mistakes
A few mistakes recur in new factory stores.
Sizing the stores for today is the first. A stores that is full on opening day has no room for the next product line.
Putting the stores in the leftover corner is the second. A stores far from the lines and the gate adds walking to every issue and every receipt.
Forgetting the tool crib is the third. A plant with excellent machines and no tool room loses hours to missing tools.
Mixing clean and dirty is the fourth. A store next to the grinding bay is a dusty store.
Choosing too many bin types is the fifth. A standard of three or four sizes per family is far easier to run.
Skipping labels and codes is the sixth. A system without addresses is a store of heaps.
Ignoring aisles and trolleys is the seventh. A beautifully laid-out store with aisles too narrow for the trolleys is a store that cannot be used.
Leaving training until later is the eighth. A system that people do not understand will not last, and a half-hour briefing on the standard on the first day saves months of confusion.
A worked example with invented numbers
To make the method concrete, consider a new plant that will assemble electrical enclosures. It expects forty people on one shift, three assembly lines, a small machine shop, a tool crib and a maintenance workshop, in a building of about three thousand square metres.
The flow map shows components arriving by truck at a single gate, passing through a receiving bay and an inspection bench, going to a stores, feeding the three lines, and finished enclosures going to a packing area and a dispatch bay. Tools flow from the crib to the machine shop and the lines; spares flow from the maintenance stores to the machines.
Classification shows about eight hundred small part numbers, mostly fasteners, terminals, gaskets, glands and small fittings; a few hundred larger components, such as enclosures, panels and cable; packaging for the finished goods; and about two hundred tool and gauge types.
The space calculation gives, for the small parts, roughly four hundred bins of three sizes in the stores and a smaller set at each line; for the larger components, two rows of selective racking with a handful of pallet positions; for tools, a crib of about forty square metres; and for maintenance, a spares room of about the same size. Adding aisles and working space, the stores and crib together take about a fifth of the building, and the planner leaves another tenth free for growth.
The zones place the receiving bay at the gate, the stores beside it, the lines in the middle with line-side panels and a trolley bay at each, the machine shop at one end with the tool crib on its boundary, the maintenance workshop and spares room at the other end, and packing and dispatch at the exit. The machine shop, which makes dust and swarf, is separated from the stores and the assembly lines by a wall.
The storage systems are standard: Supra bins in three sizes on louvre panels at the lines, Panda shelving with shelf bins and pigeon hole shelves in the stores, totes and Shop Floor Trolleys for kits, drawer containers and tool trays in the crib, a modular drawer system with lock for instruments and Visipro protectors on the racking. A location code of zone, bay, level and position is printed on every shelf and bin from the start, and a one-page standard is written before the first bin is hung.
The fit-out is phased: the stores, the first line and the crib open first, the second and third lines follow over the next months, and the plan keeps a reserve of bins and panels for both. The numbers are invented, but the sequence, from flow to classification to space to zones to systems, is the one to follow.
Special cases: electronics, pharmaceuticals and food
Some factories have storage requirements that shape the whole plan.
An electronics plant needs static control in the production and storage of sensitive components. Plan a grounded zone for the stores of such items, conductive bins and organisers, ESD workstations at the assembly benches, PCB carriers for boards in transit and floors and footwear suited to the programme. Our ESD workbench guide sets out the layout, and our ESD safe storage products page lists the range. Place the zone away from sources of static and dust, and plan the humidity.
A pharmaceutical plant needs separate, controlled stores for materials with different status: quarantine, released and rejected, each clearly marked, with access control. Plan cleanable surfaces, lockable storage for controlled items, space for batch separation and a layout that supports first-expiry first-out, as described in our article on FIFO and FEFO. Involve the quality unit early, since layout approvals matter.
A food plant needs washable, rust-free containers, a clear separation between raw and finished goods, pest control and temperature control where needed. Polypropylene bins and totes wipe clean, and keep cardboard out of production areas where possible. ALKON bins carry food-safe and recyclable marks, but suitability for direct food contact depends on the process and the rules, so confirm with the supplier and the quality team.
For each, the principle is the same: identify the special requirements at the planning stage, design the zones around them and select storage that supports them.
Multi-floor buildings and mezzanines
Many new plants, especially in cities where land is dear, use more than one floor. A mezzanine or an upper floor adds storage area, but it adds constraints.
Check the floor loading. An upper floor or a mezzanine is rated for a certain load per square metre, and a fully loaded shelving unit can exceed it. Panda shelving bays carry up to 1000 kg each, so a row of loaded bays on an upper floor needs a structural check. Spread heavy items, keep them low and place the heaviest storage on the ground floor.
Plan vertical movement. Lifts, hoists and stairs limit what can be moved, and the largest item determines the size of the lift. Choose storage that can be moved in pieces, as the ALKON panels, stands and shelving can, and plan how goods will reach the upper floor.
Plan emergency access. Aisles and exits must meet the fire and safety requirements of the building, and storage must not block them. Follow the local regulations and consult the fire authority.
Plan the flow. Material that has to go up and down for every operation wastes time, so put the fastest-moving stock on the floor where it is used.
Working with architects, contractors and suppliers
The storage plan has to be communicated to the people who design and build the factory, and a few habits help.
Share the flow map and the storage plan with the architect early, so that wall positions, door sizes, column spacing and floor levels suit the storage. A column in the middle of a planned aisle is a costly surprise.
Give the contractor the loads. Floors under racking need to carry the point loads of the uprights, and floors under shelving need to carry the area load. Walls that will carry louvre panels need to be strong enough, with fixing points planned.
Give the electrician the positions. Sockets for the Roo sliding units' lights, ESD workstations, charging points for trolleys and good lighting over aisles are easy to include at the start and awkward to add.
Ask suppliers for dimensions and drawings. Every ALKON product page lists dimensions, and our team can provide layouts and bills of quantities from your plan.
Review the plan with the people who will use it. A stores supervisor, a tool room attendant and a line leader will see problems that a drawing hides.
Utilities, lighting and clearances
Storage depends on the building's services, and they are easiest to plan at the start. A few points repay attention.
Lighting should reach every aisle and bench at a level where labels are readable, with no deep shadows between shelving units. Plan fittings over aisles and not over the shelving, and consider extra lighting at counters and inspection benches.
Power is needed for the ESD workstations, the lights on enclosed units, battery chargers for trolleys and trucks, label printers and computers. Plan sockets at the stores counter, the tool crib and the line-side areas.
Ventilation matters in hot climates and damp areas. Air movement reduces condensation on cold metal, keeps stores comfortable for the people who work there and protects stock that is sensitive to heat or humidity.
Fire safety clearances, sprinkler coverage and exits must be respected. Keep storage clear of sprinkler heads by the distance the regulations require, keep aisles and exits unblocked and keep flammable materials in approved cabinets. Check the local rules and the insurer's requirements, since they can limit the height and layout of storage.
Floors should be level, flat and strong enough for the loads and trucks. A good floor is the foundation of racking, and an uneven one causes trouble for both racking and trolleys.
Questions new-factory planners ask
How much of the building should the stores take? There is no single answer, but a fifth to a quarter of the floor, including the crib, spares and receiving, is common in assembly plants, and more for plants that hold heavy bulk stock. Calculate from your own parts.
Should I buy everything at once? No. Buy for the first phase, keep the standard and add as you grow. Because the range is modular, additions fit.
How do I decide between racks and shelves? Pallet loads and bulky items go on racking, and small parts go in bins on shelves and panels. Many plants use both.
Do I need an inventory system from the start? Even a simple list of parts and locations in a spreadsheet is a good start, and the location code scheme should be planned so that it can be moved to a system later.
Can you help me plan? Yes. Send us your part list, flow sketch and floor plan, and we will suggest bins, shelving, panels, trolleys and rack protection from the catalogue.
A planning checklist
- Flow mapped from gate to dispatch, with conflicts resolved.
- Items classified and space calculated for each class, with growth allowed.
- Zones drawn: receiving, stores, line-side, tool crib, spares, packaging, finished goods.
- Clean and dirty areas separated, and climate needs met.
- Storage systems chosen for each zone, with a small set of bin families and sizes.
- Aisles sized for trucks and trolleys, with lighting and heights planned.
- Location codes, labels, colours and count routine decided and written down.
- Fit-out phased, with spares in reserve.
- Budget estimated and payback case written.
- Training planned for the opening day.
Where to go from here
If you are planning a new factory or an expansion, send us your part list, your flow sketch and your floor plan, and we will suggest bins, shelving, panels, trolleys and rack protection from the catalogue, along with a labelling scheme. Shreeram Metafusion Engineers supplies the full ALKON range from Vashi, Navi Mumbai, as authorised stockist of ALKON Plastics Pvt. Ltd. for over thirty years, and the product pages on this website list the dimensions, packing and accessories for every item mentioned here.
Read next